
Theme
3D scenes
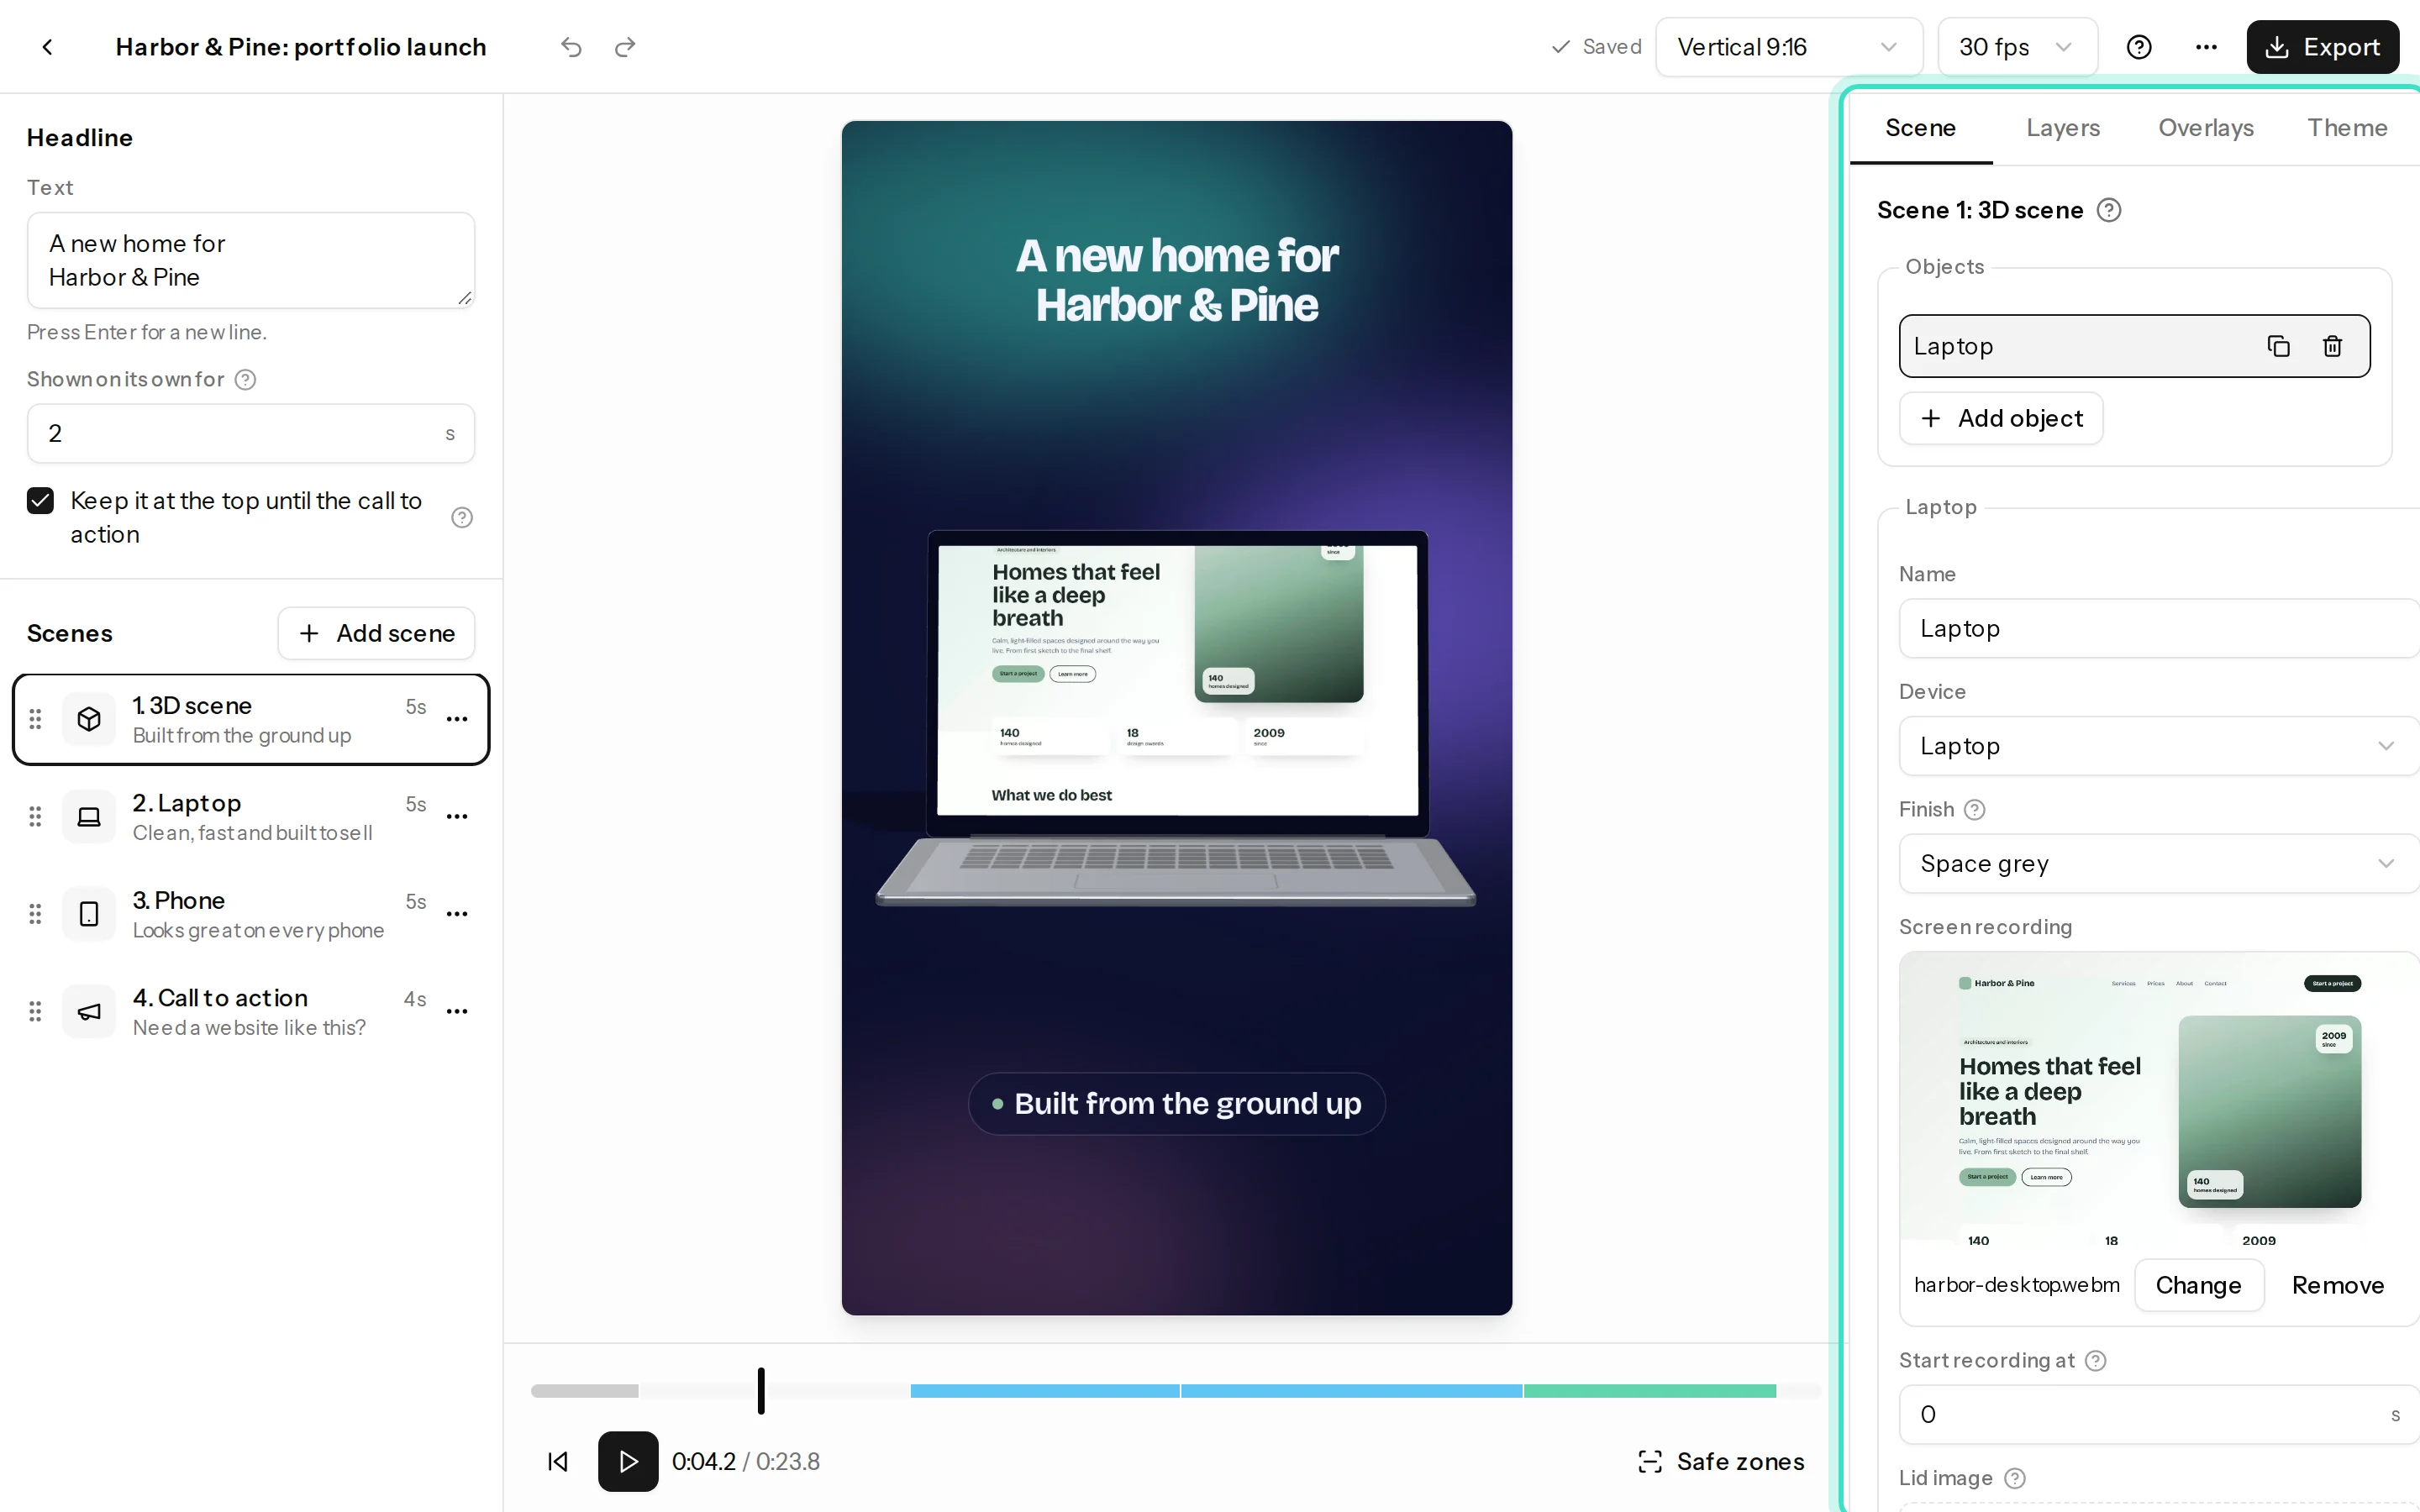
3D scenes put your recording on real 3D devices, with a moving camera and studio lighting.
Steps
- Click Add scene and choose 3D scene, or tick Render in 3D on a device scene.
- Under Objects, use Add object for a laptop, phone, tablet, monitor or browser, a piece of 3D text, or your logo.
- Select an object to set its recording, its Finish (the device colour) and its Animation: open the lid, spin in, float, flip, drop in, turn slowly or rise in.
- Choose a Camera move: front, orbit, move in, spin reveal, from above or fly into the screen.
- Under Look, pick the Lighting (studio, soft, dramatic or night), the Brightness and the Background.
Your logo on the lid
Laptops show your logo on the back of the lid. Add it in the Theme tab, or from your brand kit. To show a different picture, choose a Lid image on the laptop.
Fly into a screen
Tick Fly into a screen and continue in 2D to end the scene by flying into a device's screen. The next scene carries on with the recording, flat and full size.
Tips
- Customise turns a preset into keyframes you can edit, for full control over position, rotation, scale and the lid angle.
- Free includes one 3D scene per reel. Pro and Agency have unlimited 3D scenes.
- 3D needs WebGL. If 3D scenes look empty, see Troubleshooting.